Showing posts with label Fairies. Show all posts

Sunday, February 9, 2014

Fairy Garden Party

Hello, Viewers!

How about a little spring in the air? It would have to be last year's spring, to be sure, since there is nothing but snow in the air right now. 

Springtime is particularly suited to us Fairies, and last April (or was it May?) I invited my Fairy court to a Garden Party. Unfortunately, we did not have access to a garden to be in - instead I brought the garden inside, and placed it in the middle of the dining table.

The base was a large terracotta planter "saucer", covered with a little artificial grass mat. eFairies.com provided the pond, filled with water of course, and floating a few shimmery leaves. I used some moss from a florist supplies store, and also, from the same source, little moss-accented "boulders", to create some landscaping around the pond.

All additional items were stuff that I found around the house, scouring my cabinets and drawers, but for the future, I am planning to get a few more specialized things - eFairies has a lot of inspiration to offer!

This Fairy Garden was the centerpiece for an exuberant floral extravagance, which also included gazebo candle lanterns, floating rose candles, rose figurines, flower-shaped candlesticks - and pretty much anything floral, pink or green, that I could lay my hands on. And glittery butterflies, of course!

Small silk flowers in pastel colors were sprinkled over the layered tablecloth. Additionally, each guest had a mini floral arrangement in a ceramic basket by her plate, to take home as a favor.


In one of my local discount places I found these rather crazy floral chargers - too fun (and too cheap!) to pass up, so that became the place settings, with clear plastic plates on top so as not to hide the rosy glory.

The napkins were pink and green - rolled up to resemble a rose among leaves.


I think "profusion" pretty much covers it! Not so much aiming for sophistication, but rather running rampant with the rose theme...

The chandelier was decorated as well, with tulle streamers, birds and butterflies, a rose pom-pom, and a particularly fetching lilac flower fairy...


The craft project of the day was one of the most popular yet - Fairy Paraphernalia Boxes. I had bought pink-and-white striped cardboard boxes at IKEA (where else?), that the Fairies could decorate with fairy stickers, jewels, decorative papers, old-fashioned flower die cuts, and glitter. Lots and lots of glitter.

 Some of the remarkable creations...


The Menu

Obviously, the food was partly flower-inspired. Pink and green were heavily featured. Thus, we  opened the proceedings with a newly-invented (by me):

Pinque Drinque: Pink Champagne, enhanced with Pomegranate juice (approximately 1 part juice to 3 parts champagne), a splash of Cointreau, and some Pomegranate seeds 

Avocado salad with Smoked Salmon Roses and Radish Flowers made a fitting appetizer.

The main course was not floral at all: Mushroom/Onion-stuffed Kapons in Calvados gravy, roasted Baby Potatoes, Baby Carrots, Baby Patty Squashes & Sugar Snaps

But then, for the dessert, we were right back in the floral garden: Pink Princess Ice Cream Rose Mold - previously described in detail here

And finally, after all the crafting had renewed our appetite, this very pretty Almond Cake with Kiwi & Cointreau Topping, which unfortunately turned out so disappointingly lousy, that I cannot share the recipe until I have figured out what went wrong. (I know how it was supposed to have tasted, and this was not it!) But I am happy to share the picture!

Now you know how the Fairies fare - stay tuned for more updates!

Regards from Rosebud!


Tuesday, January 14, 2014

Snow Glitz Fairies

Hello Viewers,

Having moved through the seasons with lightning speed, we now get to the Grand Fairy Extravaganza of 2013 - the Snow Glitz Fairies! Almost exactly one year ago, the Fairy Friends gathered for a revelry in Winter White:


A silver tablecloth, with a white, lace-edged underlay, was covered with white, sparkly tulle that I had scrunched up a bit between settings to create a reference to snowdrifts. 


The base for the centerpiece consisted of one large and two small octagonal mirrors, on top of which I placed mercury silver votive holders, white pillar candles with "diamond" trim, so-called "table diamonds", and a long sparkly, silvery, flower garland.


The trumpet vase is a mirror mosaic - a mixture of rectangular mirror tiles and crushed mirror slivers - and holds white branches, to which I added a little extra glitter and snow spray. Some white butterflies with silver glitter on their wings are perching among the branches; there are also some hanging crystal prisms to catch the light and create more sparkle.


On to the place settings: white disposable plastic plates were given a diamond trim as well (the same that I used for the candles). The trim is really a kind of ribbon, with plastic bits shaped to reflect light and give a sparkly effect. It comes in several different widths, and can be found in florist supplies stores. It is extremely useful for many purposes, and adheres easily with glue. I used adhesive spray, which, admittedly, gets all over you, but works wonders for this type of projects.


The napkin was rolled up with a paper doily and held together with a rather smashing diamond napkin ring. Small, square mirrors were used as coasters.


All is ready for the Faeries to arrive! The main wine glass has an etched flower shape where the cup meets the stem, if you can discern it in this picture; its icy snow flower look made it particularly suitable for this event.


The festivities progressed, with Snowball Cookies and the customary craft project: Fairy Necklaces. We use special crafting place mats - lilac, with a fairy motif - to protect the table setting and keep our stuff gathered.


The Meeting of the Wands of the Snow Fairies...

And then the food:
The (almost) all-white Snow Glitz Winter White Menu consisted of

Kani (kosher fake crab sticks) Salad on Endive Lettuce
Zingy Tilapia, Baked Cauliflower, Yellow Summer Squash, Jasmine Rice with Slivered Blanched Almonds
Pavlova w Kiwi & Pomegranate
Coffee & Snowball Cookies

Pavlova

The simple meringue formula is as follows - you can easily do your own math:

1/4 cup sugar per egg white
1 egg white serves two persons
(This Pavlova for seven voracious Fairies was consequently made from 4 egg whites and 1 cup of sugar.)

Also needed:
Heavy cream
Fresh berries or sliced fruit - whichever kinds you like, but for best results, use fruits or berries that are somewhat tangy

There are two schools of thought when it comes to meringue: crisp and dry throughout, or soft and chewy like a marshmallow in the center. Depending on your preference you can fiddle around with vinegar and corn starch, but since I am too lazy to bother, I worked out my own compromise meringue which is crisp almost throughout, but has a hint of chewiness if you eat enough of it to actually reach the center. 
  1. Beat egg whites with mixer on highest speed until stiff peaks form
  2. Slowly add sugar, 2-3 Tbsps at a time, while continuing to beat, until all sugar has been incorporated and meringue is very, very stiff and shiny
  3. Spread in big circle on cookie sheet covered with parchment (you can draw a circle with a pencil on the back/underside of the parchment in advance if you like, as a guide) -shape with a spatula or large spoon and create a slight bowl formation
  4. Bake at 300° for 1/2 hour or until lightly golden; turn off heat and let meringue remain in oven over night. I have an old-fashioned pilot-light gas oven, and the slight warmth in the oven is perfect for drying/crisping the meringue over night; it will be crisp, but still retain a slight chewiness in the middle. Even if you have a different kind of oven, this method still works well; there is always some residual heat, and the closed oven will keep the meringue dry. If your oven cools extremely fast, let the meringue sit at 100° for an hour before switching the heat off. If the meringue should crack a little don't worry about it; the cream will hide any imperfections
  5. Whip heavy cream lightly, until very soft peaks form (do not over-whip!); there is no need to add sugar or anything else - in fact, the delight of this dessert is the contrast of flavors: sweet meringue and tangy fruits, with the non-sweetened cream acting like a heavenly cloud, enveloping and emphasizing the flavors...
  6. Scoop cream into the meringue; sprinkle generously with fruit
PLEASE NOTE: The dessert must be assembled at the last minute - if you let it sit around, the meringue will get soggy and depressed. The fruit/berries can be readied in advance, and whipping the cream (with an electric mixer) is done in the blink of an eye; it is well worth the few minutes of waiting time.

Enjoy - it is impossible not to!

Regards from Rosebud!


Sunday, November 3, 2013

Pumpkins & Pearls

Hello, Viewers!

Last week there was no new post in the Castle since I was too busy setting up a Fairy Party. So for now, let me abandon chronology, and show you instead what I was doing last Sunday.

My imagination had been set in motion long ago by some items from – IKEA (it is almost becoming embarrassing!) Large, white, lacey candle trays promised to make wonderful charger plates*, and other pieces in the same series – Skurar – seemed equally full of potential, so I knew I wanted to do something elaborate with them. The time of year obviously suggested something pumpkin-related – but how to combine these points of inspiration? Two words: spray paint.
I gave my pumpkins a bright white satin finish, and together with Skurar it was a match made in heaven. In fact, the whole table setting, when finished, had a bit of a bridal look to it. Considering that one of the mature Fairy Ladies was celebrating her 29th anniversary, and that one of the Fairy Girls had just gotten engaged, it was quite appropriate!


I started by covering the table with burlap, and added a hand-crocheted lace tablet. A Skurar bowl holds a rosemary plant, wrapped in burlap and accented with a few mini pumpkins.


One fairly - or fairily! - large pumpkin sitting in another type of Skurar bowl, again with a bit of burlap for contrast. I used two of these to flank the central bowl.


Center piece in progress - I have added more pumpkins, Skurar candle lanterns (with tea lights), and pillar candles. A couple of the pillar candles got pearl cuffs - actually elastic pearl bracelets from a florist's supply store,  made for holding flower corsages.


At the very last moment, I had the idea to elevate the plant - I added a flat-bottomed bowl, wrapped in burlap and covered with a small companion piece to the lace tablet. Also, more pearls have been added. Then, for the place settings:


Above: the Skurar candle tray that originally fueled the whole venture.

After finally deciding that going out and buying a whole set of white china (since I only possess floral china), would be a bit rich even for my party-seasoned blood, I went to the local discount place to take a look. 

Imagine my ecstasy when I found these plates: "Lace Collection" from a disposable goods company called Silver Spoons and More.

Below: the linen-look paper napkins have been rolled up with strips of burlap, then secured with pearl napkin rings.


The place settings came out looking like this! 
Below: The table in all its glory, with pearl garlands hanging from the chandelier.


...And the scene at night, with the candles lit...


One of the large candle lanterns, lined with burlap, became an excellent container for a wine bottle. I also used Skurar plant pots to hold mini baguettes and bread sticks.


The Faeries were offered extra pearls to wear, of course, and the craft of the day was tulle/pearl bracelets.


One of our Faeries loves blue...


Another is crazy about pink...


Finally, this just might be the forum for finally revealing to the world my Heirloom Recipe Collection Secret Brownies, which were served for dessert. One of the best things about these brownies is that it is a one-bowl - or rather one-pan - recipe! No messy chocolate-melting!

The SECRET is to use only first-rate cocoa. Personally, I like to use Droste (Dutch process), but if your taste runs to non-alkalized that is fine too. Just don't compromise on quality!

Secret Brownies
2 sticks margarine or butter
1 cup sugar
1 cup brown sugar
3/4 cup cocoa
1 Tbsp vanilla
3 eggs
1 cup flour
2 tsp baking powder
  1. Melt margarine/butter in large saucepan; remove from fire
  2. Stir in sugars, cocoa, vanilla
  3. Stir in eggs, one at a time; do not add next egg until previous one is fully incorporated
  4. Stir in flour with baking powder; mix well
  5. Heave into greased 9 x 13" pan; bake at 350° for 30 minutes
  6. If desired, add some walnuts or pecans - here I used honey-glazed pecans as a decoration
Makes 20-24, depending on levels of greediness, but these brownies are guaranteed to bring out the greediness even in the best of us!


Regards from Rosebud!


*It has come to my notice that the cover of the November issue of “RomanticHomes” shows a table setting where these trays are used as charger plates – but I promise on my word of honor that I have not stolen the idea; I used them as such already this past spring!

Sunday, October 13, 2013

Woodland Fairies

 Hello, Viewers!

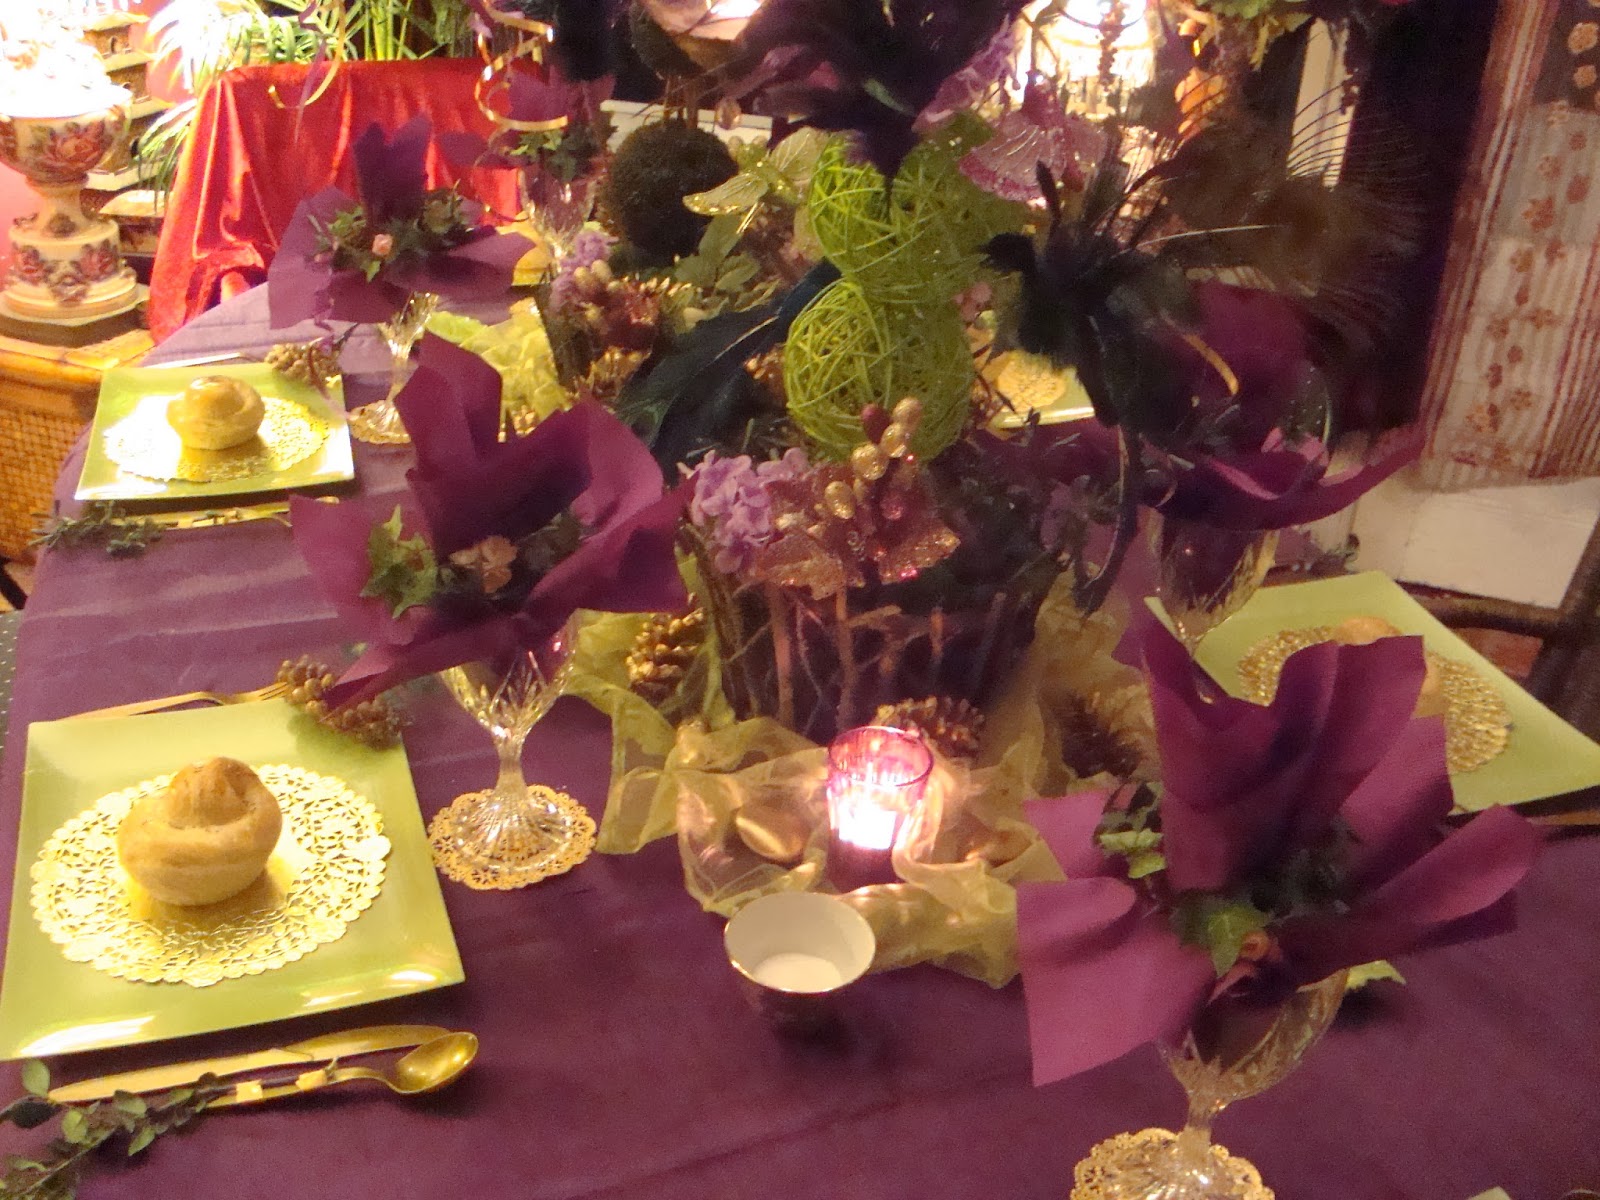
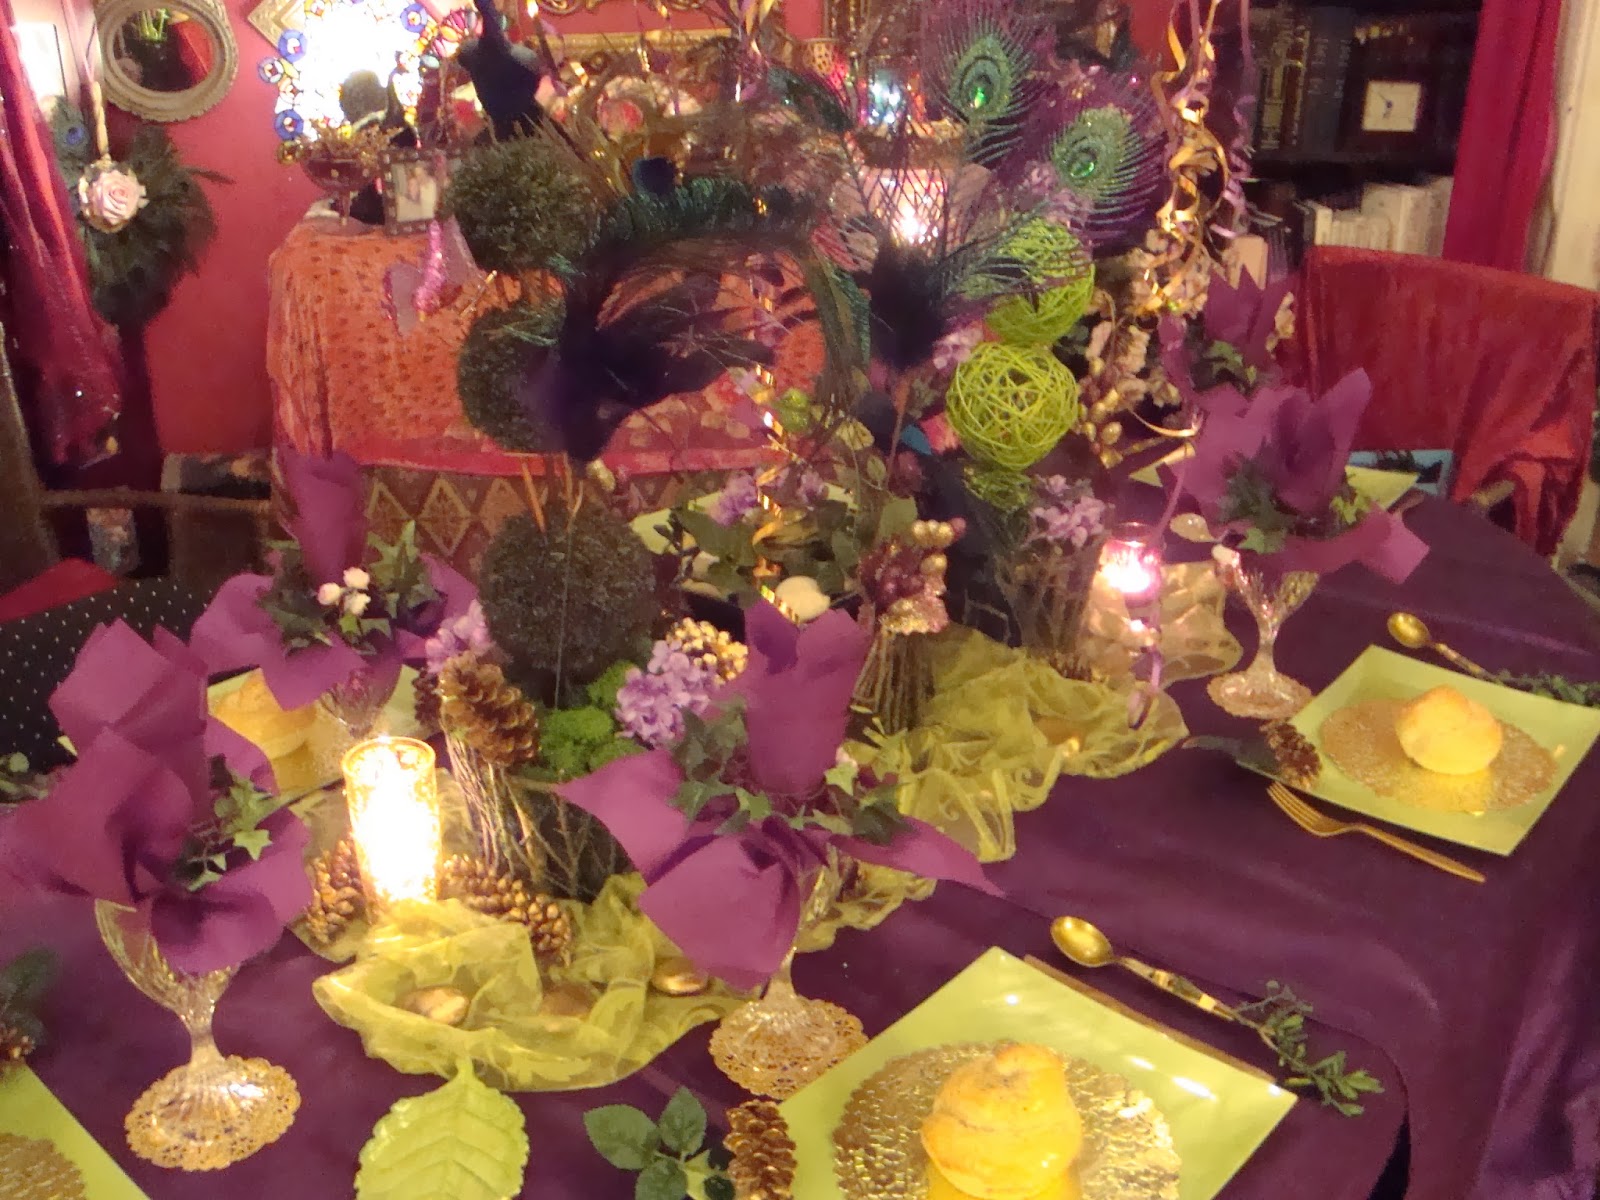
While we are on the topic of fairies, let us take a look at what happened last fall - the unmitigated success of the Convocation of the Woodland Fairies! It all started with a so-called Woodland Fairy costume that I saw, then had to purchase, on the internet. It was purple and green and perfectly adorable, and it provided the inspiration for the color scheme of the event. "Violets & Moss" it said on the invitation, and that captured it all. 
(Image from squidoo.com)

Perhaps it should be added that, for modesty, I wore my costume with a long purple petticoat (same shade as the short one here) and a purple long-sleeved shell underneath - but it still looked lovely! I found perfectly matched green pantyhose and slippers, and also added a feather headband and peacock feather earrings. So much fun!

Sadly, the colors of these following photographs are not true to reality - the flash photo shows a tablecloth in a garish, blueish purple, while the flashless ones show a color that is almost burgundy. I must beg my readers to imagine the true color, somewhere in between - a rich, deep shade of plum that was wholly satisfying to all lovers of purple.


Let us take a closer look at some of the details...


The centerpiece consisted of three mossy twig baskets, sitting on a scrunched-up lime green table runner, held in shape with some gold-sprayed pebbles and pine cones.


One basket held three lime green twig spheres, pierced with peacock
plumes and decorated with lilac hydrangea and a sparkly, lilac bird.


The middle one held a small table waterfall, with more
hydrangea and a sparkly green bird.


The third basket held an artificial three-tiered topiary - again with
extra hydrangea, a sparkly bird, and a peacock as a crowning glory.


A lot of extra feathers, candles, curly ribbons and other sundries added to the almost magical ambiance! Gold doilies made sure that the woodland didn't get too rustic.


The "gold" soup spoons were given extended handles of small twigs, attached with golden duct tape. The green plates we have seen before, but this time they were ornamented with pine cones - carefully soaked in hot, hot soap water to remove any dirt or bugs; then dried in the oven, and finally gold-sprayed.


A lantern hanging from the chandelier - lots of atmosphere!


The project of the day was - wings! I decided it was about time all the fairies had their own set, so I bought a few different sets of wings from amazon.com, let them choose the color they wanted, and provided the usual boxes of fluff - plus some extra glitter paint! As usual, I was touched to see the creative energy unleashed; all the fairies were ready to take off into outer space!

This one is going to be airborne any moment!


The menu was inspired by the woodsy fall theme as well:

Kabocha squash soup - the delighted fairies dubbed it "Woodland Soup" 
Cornish hens with wild rice, orzo, mushrooms, pine nuts, aubergines and such...
Sticky brownies with whipped topping.

Woodland Soup 
(I received the rough outline of this recipe from a friend who must remain nameless, and have made a few adjustments to it.)

1 Kabocha squash
Olive oil
Garlic powder

Place squash in oven-proof dish; drizzle rather generously with olive oil; sprinkle very generously with garlic powder. Bake at 375° for 2 hrs or more, until thoroughly soft - squash will crack, and that is a good thing. I prefer to do this step the day before, to cut down on kitchen time on the day of the party, and to make sure the squash has time to cool properly - it must be cool enough to handle.
NOTE: Strangely enough, it seems that an under-baked (hard) squash cannot be softened later, with extra boiling of the soup - I tried it once when I had accidentally taken the squash out a bit too soon, and made this surprising discovery. Therefore, make sure it is really soft before removing it from the oven!

The next day...
Olive oil
2 onions, chopped
1 whole head of garlic, trimmed with tips of peel removed
2 stalks of celery, thinly sliced
1 carrot, thinly sliced
1 parsnip, thinly sliced
handful of mushrooms - or more, if desired - sliced
2-3 2-inch pieces of ginger, peeled 
Salt, garlic powder, onion powder, marjoram, thyme - to taste
Big glug of dry sherry
1 Tbsp honey
1 quart vegetable broth - preferably without MSG, partially hydrogenated fat or other life-threatening ingredients (if you are less squeamish, you could use soup cubes & water instead)
Flesh of baked squash
Small bunch of dill, chopped
1/3 - 1/2 cup ground almonds
  1. Sauté onions & garlic head in olive oil in large soup pot on medium heat
  2. Add celery, carrot, parsnip, mushrooms, ginger
  3. Season; let vegetables soften and "sweat" well, while stirring occasionally 
  4. Add sherry, vegetable broth, honey; let simmer for up to 1 hr, or until vegetables are soft
  5. Meanwhile, remove seeds from squash; scoop out the flesh and mash roughly with a fork
  6. Add squash to soup (including roasted garlic powder from peel); simmer to heat through
  7. Taste & adjust, if needed
  8. Most likely, you will need to add more water - the soup is supposed to be fairly liquid; not a puré. For this reason you need to use some broth (or soup cubes); otherwise the soup will be either too watery in flavor - or else too thick in consistency
  9. When soup is quite ready, add chopped dill
  10. Remove from heat; stir in ground almonds - do not boil after this step
Seems weird, right? But it is DELICIOUS - ENJOY!

Regards from Rosebud!